Android Galaxy Fit wpa_supplicant

I’ve noticed a few people have tried using a custom wpa_supplicant file to enable adhoc connections on their Android enabled device, I’ve also noticed that some of these people have not backed up their wpa_supplicant files.

For anyone looking for the original file, here it is: wpa_supplicant
My phone is a Galaxy Fit running Gingerbread (XWKQ4)

Dropbox changes their ToS, all hell broke loose

On the 1st of July 2011, Dropbox changed their ToS (Terms of Service) to make them clearer and easier to understand for the layman. The result of these changes was an uproar from many users, some of whom removed personal data, all data and in some cases closed their accounts.

Disclaimer: I am not a lawyer, I am not providing legal advice, I am purely stating my interpretation of Dropbox’s  ToS.

First of all, let’s look at the ToS as it stands on 4th July 2011:

You retain ownership to your stuff. You are also solely responsible for your conduct, the content of your files and folders, and your communications with others while using the Services.


We sometimes need your permission to do what you ask us to do with your stuff (for example, hosting, making public, or sharing your files). By submitting your stuff to the Services, you grant us (and those we work with to provide the Services) worldwide, non-exclusive, royalty-free, sublicenseable rights to use, copy, distribute, prepare derivative works (such as translations or format conversions) of, perform, or publicly display that stuff to the extent reasonably necessary for the Service. This license is solely to enable us to technically administer, display, and operate the Services. You must ensure you have the rights you need to grant us that permission.

So what is getting users so worked up?

One line: “By submitting your stuff to the Services, you grant us (and those we work with to provide the Services) worldwide, non-exclusive, royalty-free, sublicenseable rights to use, copy, distribute, prepare derivative works (such as translations or format conversions) of, perform, or publicly display that stuff …”


People are concerned that they are handing over copyright and IP rights and that their data will be used to make a profit for Dropbox, either by sale of the files or their derivatives. However, what these people are failing to do is to read the first paragraph and the remainder of the “problematic line”.

Let’s take a look at the first paragraph:

You retain ownership to your stuff. You are also solely responsible for your conduct, the content of your files and folders, and your communications with others while using the Services.

Interesting, it says quite plainly that you retain ownership. This implies that you keep your copyright and your IP rights.

Now we shall take a look at the remaining part of the “problematic line”, as it is very important and most people skip over it:

… to the extent reasonably necessary for the Service. This license is solely to enable us to technically administer, display, and operate the Services. You must ensure you have the rights you need to grant us that permission.

Hmm, to the extent reasonably necessary for the Service. Is it reasonable or necessary for Dropbox to sell access to, copies of or derivatives of your work? No. So what is the problem?


Looking at what Dropbox is requesting we can see “worldwide, non-exclusive, royalty-free, sublicenseable rights to”:

  • use
  • copy
  • distribute
  • prepare derivative works (such as translations or format conversions) of
  • perform, or publicly display

What does it mean to “use”? Personally I interpret that to mean they can store it and modify it.

What does it mean to “copy”? If you have, for example a desktop and laptop computer, you save a file into your Dropbox folder on your desktop. Dropbox needs your permission to duplicate your work onto their servers/the servers of Amazon and then to duplicate it onto your laptop.

“Distribute”, like “copy” implies the movement of the data from one computer to another. You may have a device in another country, or a shared folder with a friend or business associate; Dropbox needs your permission to distribute your files to these locations.

Why would Dropbox “prepare derivative works”? Those of you familiar with the “Get Shareable Link” feature may have noticed that it can display the contents of the file(s). In the case of a PDF, it is displayed not as a PDF, but as a Flash file, similar to a Youtube video. For an example, take a look here: http://db.tt/r3PGk1T

What about this “perform, or publicly display” stuff? If I send a shareable link to a friend and that friend posts the link on the internet, as a result, my file will be shared publicly. Dropbox needs your permission to do this, whether you intended to publicly share the file or not.


In short, Dropbox’s ToS allows Dropbox to operate and provide the functionality we all enjoy.

Will I continue to use and recommend Dropbox? Absolutely.


[Update 10/7/2011]

Dropbox updated their ToS again on the 6/7/2011, in an effort to clear up people’s misconceptions; it now clearly says what I have been saying all along.


Riven crash on save/load

Skip to the solution

After completing realMyst (and enjoying it a lot), I decided to get the sequal, Riven.

Riven was originally written for Windows 98 and has a number of known problems running on Windows XP, Windows Vista and Windows 7. Most of the problems have been fixed through patches, changes to settings or other work-arounds.

At first Riven wouldn’t launch, so I tried changing compatibility mode to Windows 95 – which sorted that problem out. The next problem I encountered after playing for a while; I decided it would be a good idea to save the game, which is exactly when disaster struck. Riven packed up completely, no error dialogues, no crash dumps, it just disappeared from the screen and returned me to the desktop.

I tried to save and load a few more times but each time the same result, so I did a bit of Googling and discovered a few people with a similar problem on various forums. Some people had managed to fix their problem simply by creating a new game folder and and copying the files across, as follows:

  1. Navigate to C:\program files\
  2. Create a new Riven directory.
  3. Copy the contents of the old Riven directory (except the “data” folder) to the new Riven directory.
  4. In the new Riven directory create a new folder named “data”.
  5. Copy the contents of the old “data” folder into the new one.

This particular procedure didn’t work for me, so I decided to investigate further and fired up my favourite debugger, OlyDbg; as riven needed to be run in compatibility mode, I decided to run OllyDbg in the same mode and then launch Riven from there. Unexpectedly, however, as soon as I clicked”File>Open”, OllyDbg crashed, leading me to believe there was perhaps a problem with the GetOpenFileName API in compatibility mode.

Changing tack, I launched Riven in compatibility mode and OllyDbg in “ordinary” mode and attached the debugger. I then set a breakpoint on Comdlg32.dll’s GetOpenFileName export and proceeded to attempt to open a saved game in Riven. The breakpoint triggered, indicating that the program was crashing after the call, not before – this was a good sign as it meant that there was probably an unhandled return value or something similar.

After setting a breakpoint on the ret instruction at the end of the API stub, I pressed Run and Olly immediately returned with an access violation (attempting to access 0x000004). I tried repeating the steps a few times to see if it was always the same error – it was. I decided the best course of action was to look at the parameters being passed in via pOpenfilename and check that the structure was valid, when I noticed that the current module was “GrooveUT”. Bringing up the Executable Modules window, I quickly spotted “c:\Program Files\Microsoft Office\Office12\GrooveUtil.dll”.

Why is an office component loaded into Riven?  GroveUtil is a shell extension that can be used for syncing files and is part of the Groove application, but for some unknown reason it is loaded into every running application.


Since I don’t use Groove I decided to uninstall it:

  1. Open “Control Panel”.
  2. Open “Add or Remove Programs”.
  3. Scroll down to “Microsoft Office” (I am using 2007).
  4. Click “Change”.
  5. Remove the component “Microsoft Office Groove”.
  6. Restart your computer.
  7. Enjoy Riven.

Update: This fixed the OllyDbg crashing under compatibility mode bug also.
Update 2: Official Microsoft instructions for uninstalling Groove: http://support.microsoft.com/kb/907504 – Thanks to Paul W.

Homemade Multi-zone Overspeed Alarm

(images, code, schematic at the bottom)

A friend of mine recently avoided loosing their license by the skin of their teeth after being caught speeding. Why were they speeding? Simply because they had been travelling along a long straight road for a long time and their speed had crept up slowly without them noticing it.

Usually the penalty for an offence such as this is loss of license and taking a backward step in our graduated license scheme; having recently obtained my P1  (probationary license), I have no desire to go back to the learners permit because I unintentionally crept over the speed limit, so I decided to make an overspeed alarm.

Overspeed alarms are useful devices that notify you when you cross a user defined speed limit, which is usually set in increments of 5km/h. Generally overspeed alarms come fitted in newer cars (ours is a 1998 Ford Falcon AU), however, kits are available to add them to older cars.

Looking around the net, it appears most overspeed alarms cost about $50 and require fitting of a sensor and magnet to the chassis and axle and routing of wire behind the dashboard. These speed alarms are only capable of one speed setting at a time and require you to jackup your car to attach them, so I decided to try my hand at making my own that I could fit to the existing wiring in the car, would not require an additional sensor and could allow multiple speed settings.

I looked around the internet once more to see if it had been done by anyone else before, my results turned up no similar projects, though I did find a well documented DIY digital speedometer, which I looked over to see if it worked on the same principal that I was planning to use.

The plan

  • Allow multiple speed zones to be set
    • 50km/h (built up areas)
    • 60km/h (main roads)
    • 80km/h (arterial roads and middle of nowhere roads)
    • 100km/h (freeways, expressways, country)
    • 110km/h (freeways, expressways, country, national speed limit)
  • Provide a means to calibrate the device
  • If the national speed limit is exceeded, continuously sound the alarm

How it works

The car contains a Vehicle Speed Sensor, which is located in the transmission and connected to the output shaft. The VSS is basically a 12v hall effect sensor and a spindle with a magnet on it; a gear turns the spindle causing a square wave (pulses) 0v – 12v DC. On our car there are 12 pulses per revolution of the wheels.

These pulses are counted over a time period of 1 second and the speed determined.

To count the pulses and calculate the speed I chose to use a PIC 16F88 (that’s all I have on hand at the moment), however a PICs maximum input voltage is 5V, which creates a problem.
Looking over the repair manual I discovered that the VSS signal goes to the instrument cluster, where the voltage drops to 10v and is then sent to the ECU; this is still too high but is easier to manage.

The trick to converting this unusable voltage to a more workable voltage is to setup a voltage divider that will give us an output of 2.5v – 5v when the  the signal line is high and <2.5v when the signal line is low. The voltage divider was constructed using two 2.2kΩ resistors. Originally I had used a  a 120Ω and a 150Ω resistor, however the current passing through these was too high and as a result, was loading the signal line (causing the voltage to drop to 1v instead of 10v).

The output of the voltage divider is connected to RB0 (pin 6), which is an external interrupt pin. When the interrupt triggers, a variable holding the number of pulses is incremented.

By knowing the circumference of the wheel (~196cm) it is possible to calculate that there are 510.2 revolutions of the wheel in 1 km. Since we also know that there are 12 pulses per revolution, we can deduce that there are 6122.45 pulses/km. If you are travelling at 1km/h there will be 102.04 pulses per minute or 1.70 pulses per second.

Knowing this, we can calculate how many pulses occur at each of our selected speeds.

A timer was setup to count in 1 second increments – this is no easy task, so I borrowed some code from Roman Black – when the 1 second interrupt fires, the code checks how many pulses have been recorded and if necessary sounds the alarm and then resets the pulse count.

ToDo

Add in calibration code. This will work by taking 10 samples over 10 seconds at 50km/h and calculating the average number of pulses at 10km/h

Schematics, Code, Images.

Overspeed alarm PCB layout

Source code – written in MikroBasic

Alarm tone – recording of the alarm

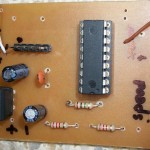
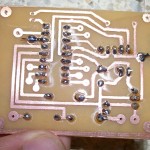
Overspeed Alarm Schematic Overspeed Alarm PCB Components Overspeed Alarm PCB Tracks

Disclaimer:
This information is provided ‘as-is’ without warranty of any kind. I take no responsibility for what you do with this information.

WMP Hotkey Handler

Windows Media Player Hotkey Handler

Windows Media Player Hotkey Handler (phew, that was a mouthful!) is a small app that runs in the background of your system and listens for particular hotkeys, which it uses to control Windows Media Player. It was originally written so I could control my music whilst playing Counter-Strike 1.6, mainly so I could control the volume without switching windows and without adjusting the entire system volume.

WMP Hotkey Handler recognises the following shortcuts:
CTRL + SHIFT + /                  Pause/Play
CTRL + SHIFT + <                 Previous track
CTRL + SHIFT + >                 Next track
CTRL + SHIFT + UP              Volume up
CTRL + SHIFT + DOWN       Volume down

Features

  • Low memory profile (1,08KB)
  • Low CPU Usage (0%)
  • Can be dropped in the Start Menu Startup folder and left running all the time
  • Compatible with WMP 9, 10, 11, 12 (and possibly others too!)

Drawbacks

  • Unable to stop a track ( I could add this, but have not had any real use for it)
  • Unable to start WMP (again, this could be added)
  • Hotkeys can’t be customised (once more, this could be added)

The drawbacks are few, but they have not really been a problem for me; if I get enough/any requests then I will add new features to mitigate these drawbacks.

WMP Hotkey Handler was written in Visual Basic 6.
WMP Hotkey Handler can be downloaded here.
The source code is currently unavailable.

File Encryptor

File Encryptor

Do you have the need to protect your documents from prying eyes? If so, this may be the tool for you!

File Encryptor takes any file and uses a simple, yet effective encryption method to protect your files with the password/encryption key of your choice; simply tell it which file you want to encrypt, enter a password and press encrypt. The file will then be encrypted using XOR encryption and a new, encrypted file will be generated with a .enc extension.

eg myfile.jpg -> myfile.jpg.enc

Decrypting is just as simple, select a .enc file, enter the password and press decrypt; the file will be decrypted and the original restored.

Features

  • Quickly encrypts/decrypts files.
  • Uses a non standard algorithm.
  • Allows you to choose if the original is deleted when the file is encrypted.
  • Allows you to choose if the encrypted file is deleted when the file is decrypted.
  • Brute force protection (If the password is not correct there is no warning, the output will be garbage.)
  • Case sensitive.

Drawbacks

  • If you forget your password you may never be able to decrypt your file.
  • It may still be possible to use frequency analysis to calculate the password.
  • Palindromic passwords will not work. eg. ‘abcba’, ‘ABBA’, ‘glenelg’.
    Passwords such as ‘race car’ and ‘go hang a salami im a lasagna hog’ are fine as they do not reverse perfectly due to spaces.

File Encryptor was written in Visual Basic 6.
File Encryptor can be downloaded here.
The source code is available here.

AutoRun Disabler

AutoRun Disabler

Ever inserted a software CD and had it automatically open up an installer or menu screen? Perhaps you have inserted a USB drive or external hard drive and had a similar thing happen?

This automated action can be very useful and time saving, especially for the inexperienced computer user, however, it presents a very real and easy to exploit security risk.

When you insert a CD, connect an external drive or open a network share, Windows automatically looks for a file called Autorun.inf; this file contains a set of plain text instructions that tell windows what icon to give the drive and which programs to execute immediately and can even add new menu items when you right click the drive in Explorer.

The contents of Autorun.inf generally look something like this:
[AutoRun]
icon=setup.ico                                 ;choose an icon to use for the drive
open=setup.exe                                 ;automatically run setup.exe
shell\readme = &Read Me                        ;add a Read Me option to the right-click menu
shell\readme\command = notepad readme.txt      ;when Read Me is pressed open the file readme.txt using notepad

It should be immediately obvious to most people that it would take no effort at all for a virus to copy itself and an Autorun.inf to your portable devices, which you no doubt will connect to other computers, whether they be at home, school or in the office or visiting an important client to give a presentation. Once the device is connected to another computer, Windows will unwittingly run the virus, which will proceed to install itself on the system and likewise copy itself to all portable devices and where possible network shares.

These tactics are already very common with malware and viruses and are only increasing in use.

To help protect my own computers from other peoples portable drives and my own portable drives I have used in other computers, I have written AutoRun Disabler.

AutoRun Disabler does exactly what the title suggests, it disables all Autorun files across the system and allows for them to be re-enabled easily when necessary. While there are many methods for doing this, the one I chose to use is virtually fool proof. Windows does allow Autoruns to be disabled through device manager, however, on some systems it does not honour the setting; while Microsoft has released a patch for this, there is no guarantee that the feature will not be broken in future or that you have the patch installed on your system.

Simply click the Protect button and all Autoruns will immediately disabled. To re-enable Autoruns, simpy click the Unprotect button; some times it is necessary to restart your computer after clicking Unprotect.

How does it work?

Windows provides an easy way of remapping ini files to registry keys; by using this, we can map all Autorun.inf to effectively nothing. Now, when you insert your external storage device, Windows will look for Autorun.inf, and if it finds it, it will go to the registry to check if it has been remapped, upon doing so it will see the mapping, determine there are no instructions to carry out and do nothing.

The registry key for remapping ini files is located in:
HKEY_LOCAL_MACHINE\Software\Microsoft\Windows NT\CurrentVersion\IniFileMapping\

All we need to do now is add in an entry for Autorun.inf:
HKEY_LOCAL_MACHINE\Software\Microsoft\Windows NT\CurrentVersion\IniFileMapping\Autorun.inf

Lastly, we add a Default string value:
@SYS:DoesNotExist

AutoRun Disabler was written in Visual Basic 6.
AutoRun Disabler can be downloaded here.
The source code is available here.

MSN Virus Remover

MSN Virus Remover

MSN Virus Remover is a tool that removes annoying MSN viruses from your computer. I started developing in December 2007 after a few of my contacts contracted MSN viruses and I could put up with it no longer.

For those of you who don’t know what an MSN virus is, they are generally simple programs which install themselves on your computer and connect you to a botnet and proceed to attempt to steal passwords, banking details, CD keys from the registry, have capabilities to launch DDOS attacks, can update themselves and of course spread through a variety of means including, but not limited to dropping themselves in the shared folders of P2P applications (such as Limewire, Emule, Ares, etc) and spamming your MSN contacts with messages such as:

  • do you think my picture is too kinky for myspace?
  • check out my new photos, i just scanned them

These messages are generally followed by a link of file transfer request.

MSN Virus Remover was written in Visual Basic 6.
More information about MSN Virus Remover and a download link can be found here.
This project is closed source.

WP-reCaptcha

Since the creation of this blog I have had the ever useful Akismet plugin enabled. Akismet, for those who don’t know, is a WordPress Plugin that attempts to recognise and detect spam. Once the spam is detected, it is moved in to a special spam folder, which I periodically check for false positives and then purge.

My current Akismet stats are as follows:
111 spams caught, 0 legitimate comments, and an overall accuracy rate of 100.000%.

Date             Spam Count
2010-02            4
2010-03          10
2010-04            9
2010-05          87

It generally only takes a few minutes to sort through all of the spam, however, I can see a bit of a trend is occurring and personally, I’d like to stop it before it escalates any further. It is for this reason, I have decided to add another layer of protection. Enter WP-reCaptcha.

WP-reCaptcha is a powerful plugin that takes advantage of reCaptcha to prevent spammers from posting on your WordPress blog. It has many different settings to allow you to customise many aspects of its appearance and behaviour. In this particular instance, I have decided to only enable its most basic functions:

  1. Require “Anonymous” users to fill out a captcha when they attempt to post.
  2. Require all new registrations to fill out a captcha when they are registering.

The effect of this will be all automated spam bots will be blocked from posting anything and human spammers will (hopefully) be filtered by Aksimet.

This means less time sorting spam and more time doing what I want to do.

Homemade PVR/DVR with Mythbuntu – Part 1: Intro & Hardware

The Australian Government has decided to close down the broadcast of all analogue TV signals, replacing them with SD and HD digital broadcasts. Whilst moving forward is a good thing, the closure of analogue stations presents a problem for anyone wanting to record free to air television, namely my family and myself. While there are (and have been for a while) a number of commercial solutions to this problem, they are all (at the time of this writing) quite expensive and lacking in features and functionality. There is, however, another solution to this problem, the home made PVR; I will be documenting the steps I have taken to design, build and fine tune this system here.

Home made PVRs are not all that new and have in fact been around for quite some time, however they have not been something I have had any interest in, until the Government made its announcement late last year, that is.

My aim was to build an HD PVR that could do what I want, for less than a commercial unit; as it turns out, it is rather easy to beat the current prices.

Existing Systems
Harvey Norman sell a range of devices varying from $280 to $1000, the cheapest being the Topfield PVR Ready High Definition Set Top Box and the most expensive being the Topfield 500GB High Definition PVR.

The Topfield PVR Ready High Definition Set Top Box is not much more then a glorified set top box, capable of tuning in to one HD digital channel and recording it to an external hard drive.

On the other end of the spectrum we have the Topfield 500GB High Definition PVR, a much more functional system, capable of recording 2 HD channels at the same time. It also has an optional 10/100 LAN connection (presumably for acquiring TV recording schedules and moving recorded video across the network), 3 USB ports for connecting optional external storage and an internal storage of 500GB. Furthermore, there are features for advert skipping and is able to fast-forward up to 128x speed and can function as an MP3 player.

Whilst the Topfield 500GB High Definition PVR appears to be the best all-round system, it is a bit on the pricey side and quite frankly, I wouldn’t want to spend so much.

Designing a homemade system
Whilst browsing the web a few months a go, I came across a very interesting piece of software called MythTV. MythTV is a Linux based PVR system designed to record cable/satellite, analogue and digital (both SD and HD) television. It can also playback the recordings, automatically detect commercials and skip commercials or remove them entirely to save HDD space, pause and rewind live television, burn recorded shows to DVD, stream live TV and pre-recorded shows to multiple frontend systems or even over the internet, function as a jukebox, tell you the weather, be controlled via the internet (eg schedule recordings, etc) and much, much more.

MythTV setups are highly modular and can consist of multiple back ends and multiple frontends and hybrid systems.

Backends are used to record and distribute video, manage the database (used to store recording information, programme guides, etc); they tend to be located in rooms other then the viewing room or locked in cupboards, the basement or under the stairs as they usually are noisy (due to fans) and aesthetics don’t matter.

Frontends sit by your TV or projector, they are usually designed to be quiet,  can be diskless and only have the job of streaming the video file and outputting it to your viewing device and/or sound system.

Hybrid systems are a mixture of a frontend and backend system and are generally used by people on a budget or those who do not care how their setup looks or whether or not it is noisy.

After learning of MythTV, I did a fair bit of research, including reading through the wiki, mailing list, forums, reviews and hardware specs. I then joined the Ubuntu forums where I asked for advice on designing and building my first system. I had already decided that I would need at least 1TB of disk space and a dual layer DVD writer as well as being able to record at least 2 channels at once.

After discussions with several of the forums members and looking around the MSY parts list, I came up with the following hardware:
Motherboard: GA M85M-US2H ($70)
CPU: AMD Athlon II 240 ($65)
RAM: 2x Kingston 1GB 800 DDR2 ($29) – I intended to buy 2 1GB sticks, however due to a mix-up at the store, I bought 1.
HDD: Seagate SATA 1TB ($101)
TV Tuner card: Hauppauge Nova-T 500 ($64.67)
DVD-WR: Aopen SATA ($33)
Case: Coolermaster RC360 ($85)
Thermal Grease: Arctic Silver 5 ($9)

Total: $456.67

The motherboard I chose is a Micro-ATX with an inbuilt Nvidia 8100 chipset which is capable of VDPAU (allowing an MPEG encoded file to be sent directly to the GPU, removing the burden of decoding from the CPU), furthermore it has an inbuilt HDMI port and the integrated sound card is hardwired to the HDMI output and 10/100/1000Mb Ethernet. The board I purchased was the last of its  model at the South Australian MSY stores; it was returned under warranty as it was missing its backplate, so they kindly took $5 off the original $75 price.

The Hauppauge Nova-T 500 is a PCI card capable of tuning in to 2 HD channels at the same time and is well supported under Linux and MythTV. I bought mine second hand off ebay; brand new it costs ~$190. It is unable to tune in to analogue stations.

The case is a Micro-ATX/ATX case, specifically chosen for its dimensions and ability to be used as either a tower or desktop. It came with a PSU and has a nifty screw-less drive mounting system, which I found holds the drive tightly and securely and was easy to use. The case will fit nicely in our cabinet, replacing the VCR with a 4mm clearance above it and several inches clearance either side.

Here is a picture of the “completed” unit. It is still missing IR (for the remote).
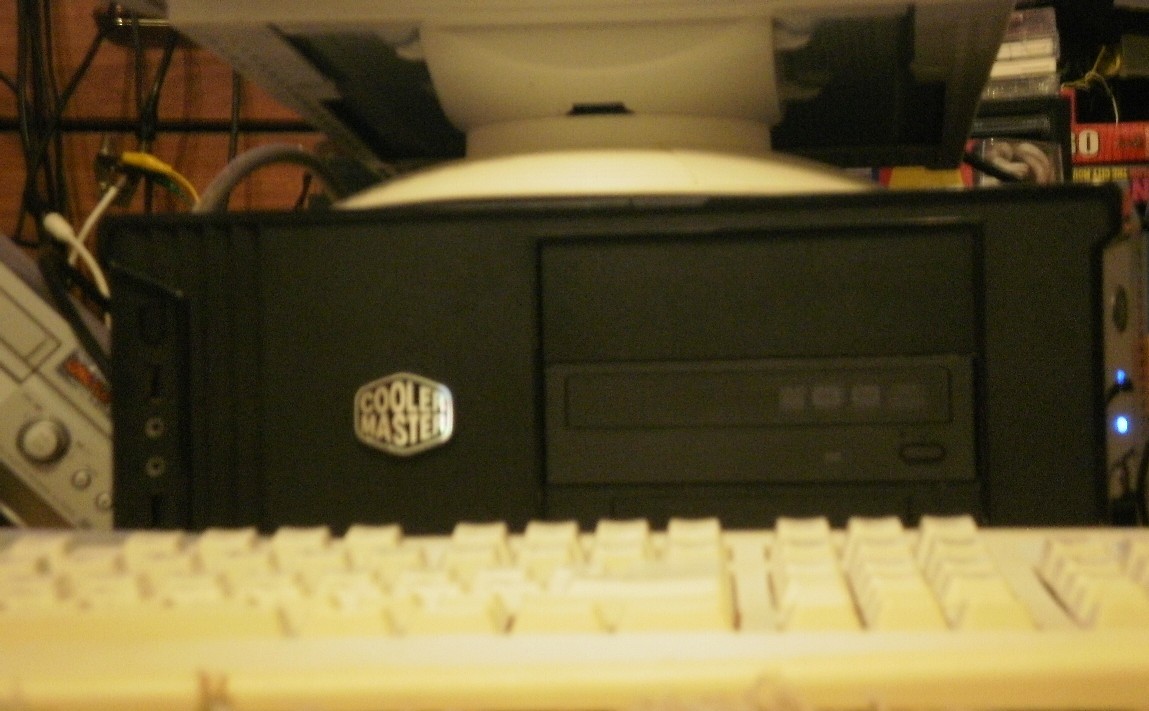
Assembled MythBox - Click for fullsize image

Assembled MythBox (Click for larger image)